miniproject: Group 7
Hot ChocLED!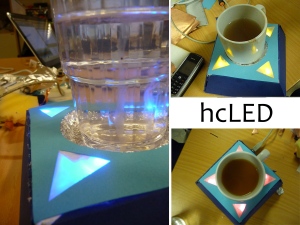
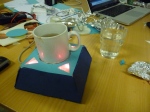
Do you always burn your tongue on a fresh brewed coffee because you’re in a hurry? Do you forget your hot drink often and experience the “special” taste of cold coffee then? The solution for this problems is called hot chocLED. Just plug hcLED to your computerUSB or to another power supply and place your drink on it. HcLED will light up. The colour shows you if your drink is cold (blue), warm (yellow) or hot (red). The heat is conducted via aluminium foil to a LM35 temperature sensor. The signal of the sensor is interpreted with an arduino that switches the light on and off concerning the actual state. The spot for placing your glas or cup is a bit soft to adapt as good as possible to the container for the best possible heat conduction. HcLED is very light, easy to use and fits in almost every modern kitchen. The USB port can be used to enhance hcLED by everybody because the hot chocLED software is open source. So stay tuned for the processing user interface or for the hcLED twitter app ;D.
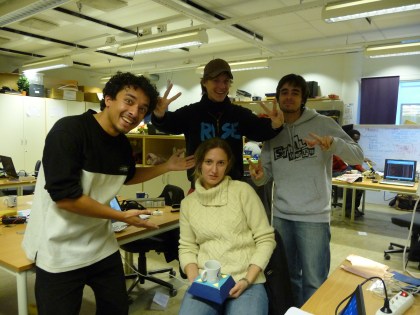
Hot chocLED is the miniproject of Naghmeh, Suvash, Diogo and Alex (Group 7).
Alex
This project involved hacking into a Logitech Gamepad, which would be controlling the Super Mario game character in a computer ( emulated inside a Nintendo Game Emulator ). Instead of directly using the gamepad, wearable sensors/switches were made which connected to an Arduino, which in turn then controlled the gamepad using a hack in the circuit.
We(Group 7) fabricated two bands which could be worn over elbows or knees as preferred and two switches which were intended to be place inside shoes. Bending the elbows/knees would move the Mario in either directions, while the other two buttons performed the “Fire” and “Jump” action.
Below is a video in action…
Super Mario Game-hack-ed ! on Vimeo
Below are few images of the sensors that were created for the prototype to work.
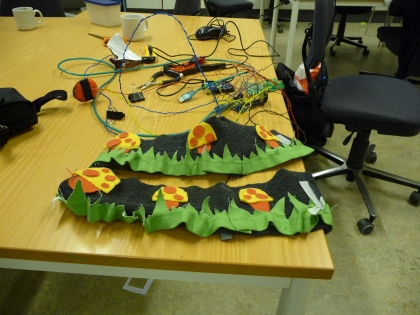
Controllers/sensors created for the prototype
Our group (No. 7) consisted of Naghmeh Taghavi Nejad Deilami, Diogo Laginha Machado, Alexander Neumann and Suvash Keshari Thapaliya.
Filed under: Labs, Projects, Tech | Tags: compose, electronic, experimental, game, generation, group 13, kid, learn, loop, melody, music, note, notes, play, sound, sounds, tempo, tone, tones, toy
Compose:Me is designed as a toy to help kids learn music, recognize notes and compose some simple music.
The device was designed to look like a piece of sheet music (although we did not end up drawing the lines of the staff in our prototype) where you can place magnets that function as notes. The notes are then automatically played in a loop and can be changed in realtime.
There are eight different columns where you can place notes (magnets) and you can place either one or two notes per column. We are working on increasing this number so that chords can be played. Currently the odd rows correspond to the notes EGBDF and the even rows correspond to FACE. The LEDs at the top of the columns indicate which column of notes are being played. At the bottom of each column is a switch that can change the length of the note between short or long. The overall tempo can be changed with the rightmost slider and the cycle speed of the LEDs changes to match the tempo. The device has internal speakers but can also play the music on earphones or external speakers. The volume is controlled by the leftmost slider.
After presenting this project in our Physical computing course we went to the Valand School of Fine Arts to present it at an experimental music exhibition on October 16, 2009.
We received some very positive feedback and it has encouraged us to keep on working on the device. Our first goal in improving Compose:Me is to upgrade it so it can handle more than two tones at a time. Other ideas we have are to create similar devices that can interact with each other and make Compose:Me communicate with a computer to be able to play more complex sound with it.
David and Eric presenting Compose:Me at the Valand School of Fine Arts with our biggest fan Alex.
Eric Hauchecorne and David Marshall for group 13
Filed under: Labs
No Traffic Jam technology provides an efficient, dynamic way to schedule traffic lights at an intersection. The goal of this adaptive system is to reduce traffic congestion on the roads caused by stopping the flow of traffic at a set of lights. This will decrease the amount of time drivers spending waiting in traffic by giving higher priority to busier roads.
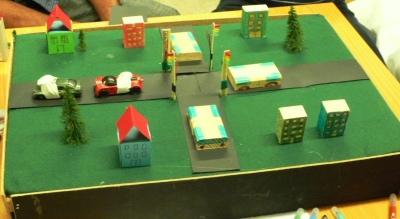
The system tracks usage statistics on the roads in much the same way as a web server does in order to determine programatically which roads are busier and should therefore have priority. When implemented in a real-world system, these usage statistics should be stored for a much longer period of time and be divided by hour and day of the week. This would allow peak hour from 5pm-6pm on Wednesday to prioritise different roads than midday Thursday for instance.
Additionally the lights will only turn green on a road that contains traffic at that moment; this prevents time being wasted on routes with no momentary traffic.
The model we created uses 4 magnetic relays acting as sensors to detect the cars, these would be replaced by something more sofisticated sensors when the system is implemented on a larger scale. LED’s were used to represent the traffic lights, magnets attached to toy cars to activate the sensors and an Arduino board acted as the microcontroller for the system.
We hope this system provides a glimpse of the possibilities available for a more intelligent road network system.
Group 15
consisting of Akbar Abdi, Adnan Alsaid, Ranjith Anantharaman, Lian Duan, Onur Kurt and Jonathan Osborne
 We decided to use the Globo circuit. We built a house with lights that turn on when it’s dark. The house has two windows on the roof that we can open to let the light in, when the roof windows are closed the lights will turn on. This was a good way for us to get familiar with basic electronics, like soldering, building circuits etc.
/Group 10
 |
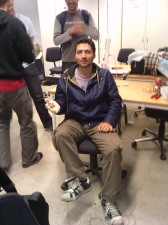 |
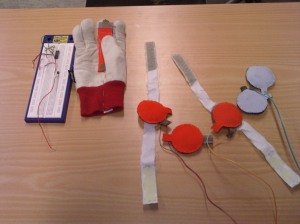
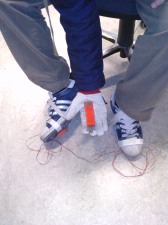
Our project was developing an interface for playing Super Mario game with wearable buttons but without using Arduino. The game is controlled by 3 buttons and a bending sensor for every action: One is for going right and another for going left which are put on the feet and controlled by pressing them with our feet, one button for jumping that is placed on the bottom of the player, a bending sensor which is placed on a glove to simulate shooting action by opening hand.
The first problem we encountered was that the jumping and firing signals needed to be inverted. Since the player sits on the jumping button during the game and he/she has to stand up and release the button in order to jump, the signal was supposed to be inverted. The similar issue goes for the fire action too. We built a circuit to be able to invert these signals. We could get this to work when we tried it with a multimeter, but not when we connected it to the gamepad. When we were almost out of time we heard from Mika that there was a problem when trying to connect the gamepad with transistors. We should have used the buttons on top of the gamepad, but we didn’t know that until we were out of time.
We also had a problem when we connected our buttons to the gamepad. The buttons worked, but when we connected them to the gamepad we got shortcircuits. We suspect that this could be due to some problem with soldering of the gamepad, which was quite hard.
It was a good introduction to wearable technology. This field was something that none of us was really familiar with and it was interesting to try. If we did this again we would probably used an arduino. We decided not to use it so that we didn’t have to code anything, but when looking back we realize that it was a mistake.
/Group 10
We’ve played with QR Codes before, but now you can actually wear them. iD Shirt allows you to buy a t-shirt with your contacts printed as QR-Codes. Think about how easy it is to just get the contacts of someone you just glimpsed at a party.
Or you can play QR-kill with your friends.
By Alcides Fonseca, Group 6
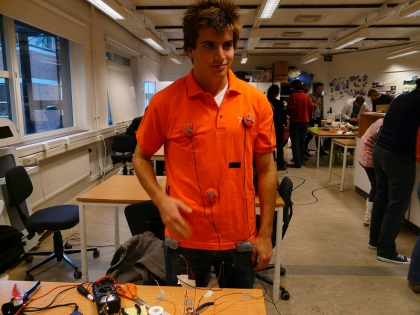
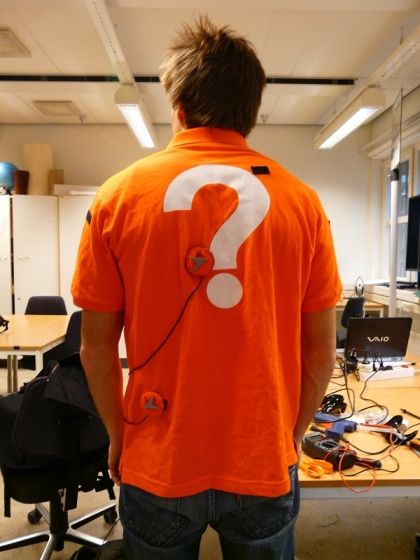 This is the T-shirt we designed for playing Pacman. It contains four direction buttons and two for “start” and “select”. Four direction buttons are all movable and can be attached on the shirt wherever u want , which means the direction RIGHT could be your lift arm and UP could be your back, which really make the game harder but more fun.
Group 12
Filed under: Labs
Robochess is the name that Ebrahim Jahandar, an 18 year-old student in Iran, gives to his robot that plays against you on a chessboard. The robot senses the positions of the pieces using magnetic sensors on the bottom of the board; it has a movable hook to pick up the pieces and move them around on the board. The robot can verify your moves as well as its own; once the opponent has made a legal move, it uses its algorithm to determine an appropriate move. The selected piece is then moved to the new cell on the board.
http://www.technovelgy.com/ct/Science-Fiction-News.asp?NewsNum=2279
By Maziar Shalbaf (Group: 11)
Filed under: Labs
This is a really cool product presented at TED by MIT grad student David Merrill in february this year. The product is a kind of high tech, interactive computers, stuffed into small blocks with a screen on top. These little blocks, called Siftables, can be used in alot of really cool ways, by moving them around and put them together. You can use the to do math, play songs, blend paint – just anything it seems. They might really be a toy or learning aid of the future, check them out!
/ Henrik Andersson
Filed under: Labs
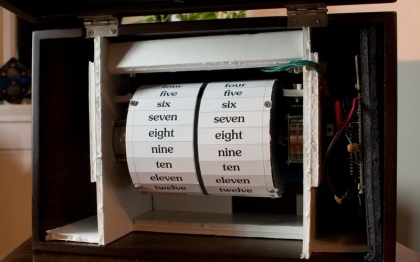
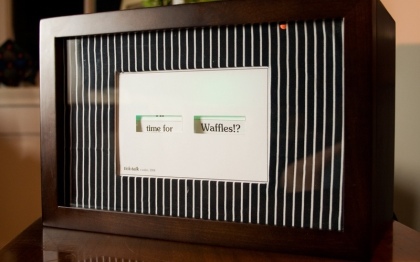 Tick talk clock tell us the time however it is not extremely useful clock as it should be in general. It is not accurate because it sometime become lazy and prefers to change the subject rather than talk about the time. It consisted of Arduino, stepper motor, LEDs and cylinders. The clock software is responsible to keep the time running on the Arduino. It made by Nicholas Wallen. Further information could be found in:”http://www.nicholaswallen.com/tick-talk”
“via Hobby / Hacking”
Ghazal FakhtehYavari, Group 3
Filed under: Labs
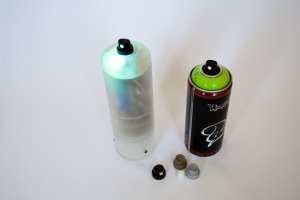
The spray can is built upon the Arduino platform and uses different sensors and electronic modules like a RFID reader, a super bright RGB LED, a Rotary Encoder, a Bluetooth module, a force sensitive resitor (FSR) and loads of wires and solder to implement the desired behavior. For tracking the spray can I use a Wiimote and the WiiFlash ActionScript 3 library and server, but this could also be replaced by a standard webcam and an adequate tracking implementation.
I have thought the doodle, but does not have the courage. Now having this Spray is the way to do it on screen instead of real wall. the other reason I find it interesting is that I am not a good painter and maybe I can practice at home first.
LINK:http://blog.formatlos.de/category/physical-computing/
Jiaxin Wang;Group 12
Filed under: Labs
I really like this project and you could use it in daily life and different places. Hiroo Iwata is the one in University of Tsukuba created this project. The arrangement of tiles will be handled automatically by tiles in order to build a floor under your foot. By the pressure on the surface of each tile, tiles could make a decision for user direction. So, this information will be used in order to arranging the tiles automatically and the user will continue to move in a way without moving forward in reality.
Via: Hobby / Hacking
Yasaman Vaziri, Group 2
Filed under: Labs
Interactive 3D holograms is something that we don’t see very much of today. The technology is not as far advanced for the majority to be able to take advantage of it.
In the future when the technology is more advanced the opportunities for this technology is endless. In the professional life you can imagine to use this technology in curgery, operating on a hologram, while robots with a thousand times better precition is following your moves in the real body.
Of course, this technology will be used for lots of fun as well 🙂
Kristoffer Holmberg
Group 4.
Filed under: Labs

Skål is a media player designed for the home that lets you interact with digital media using physical objects. http://www.skaal.no/index.php
The technolighy behind of this product is only RFID, the reader is located in the “bowl” and tags are attached on different objects. By putting objects into the “bowl”, screen can show different videos.
This case induce me to think more about RFID. Maybe one day, RFID can be used into all products, all animals or even all human’s body. The way to pay for the shopping is only walk through a “door” which is a RFID reader, Depending on the tags placed in products and also human’s body,computer transmit money from our bank account to the shop automatically. Yes, this is the benifite we get from RFID, everything has two sides. Ubiquitous RFID make our life efficient,however, privacy is going to be worried about. So far, there’s no law to set limit on RFID technology, which means shop can put tags into shoes and clothes or any thing to trace people.
We, designers should think about weakpoints when we are creating “magic”.
High technology can be also harmful!
Yiwen Wei Group14
Filed under: Labs
Check this out!<a href="”
/Fanny
This project is actually about hacking the human brain. Its for people who have diseases related to neurons. It s used to hack into the brain and stimulate the neurons, the wires are obviously used for that. But think of that how much energy, the best hackers on our planet spend on other things . What if they apply all their energy on such researches, imagine the number of people to be treated by it. Quite interesting!!!!
Group 6 Ana Sufian.

http://www.nextnature.net/index.php?tag=physical-computing
http://www.nextnature.net/research/wp-content/uploads/2009/07/bci_530.jpgHa
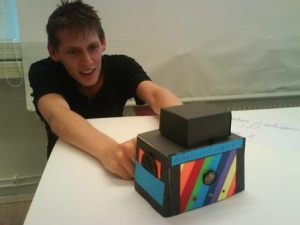
Using the chuckles circuit we have created the latest in Disco Tech, namely the ANARUGUSUKURATCHI. It is a colorful DJ turn table which will light up any party. It has a speaker and three LEDs on the front which blinks to the music you create. It comes with a set of 7 paper discs which are attached to the side and don’t forget to turn on the light on top!
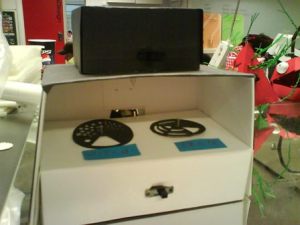
As you see on the back the LDRs get different amount of light when you turn the discs and thus creates the music and releases your and your guests inner Disco Stu!
WARNING: may create headaches if used for too long without break, do not dip in water, do not disassemble ANARUGUSUKURATCHI on your own but go to your nearest ANARUGUSUKURATCHI certified electrician.
(Batteries not included)
By Group 1Filed under: Labs
Hello to you all!
We are group 8 and we designed and built a kids tent that reacts to peaking with a sound similar to chuckles, as if the kids were screaming and trying to “kick” you away.
It has a switch at the entrance and a LED that lights with the same frequency as the chuckles. Hope you like it!
See video


